Here are the hammer and trigger posed with an alligator setup, as per request. These positions are approximate but should illustrate how the Muley action works, inside of that square tubing frame.
EDIT:
Trigger pull is about 1/2 inch or so. Long but you cannot tell when it is going to break
EDIT:
The grip frame was attached by 2 rivets going clear through the grip frame and the main frame tubing. Then plumbers solder soldered together.
Reason: I do not have a welder or brazer anymore (bummer) Brazing would have eliminated all of that fiddly riveting and soldering.
The hammer and trigger pins are just sitting in the frame, nothing prevents them from moving out and hitting the ground. I suppose they could be made a bit longer and safety-wired in place.
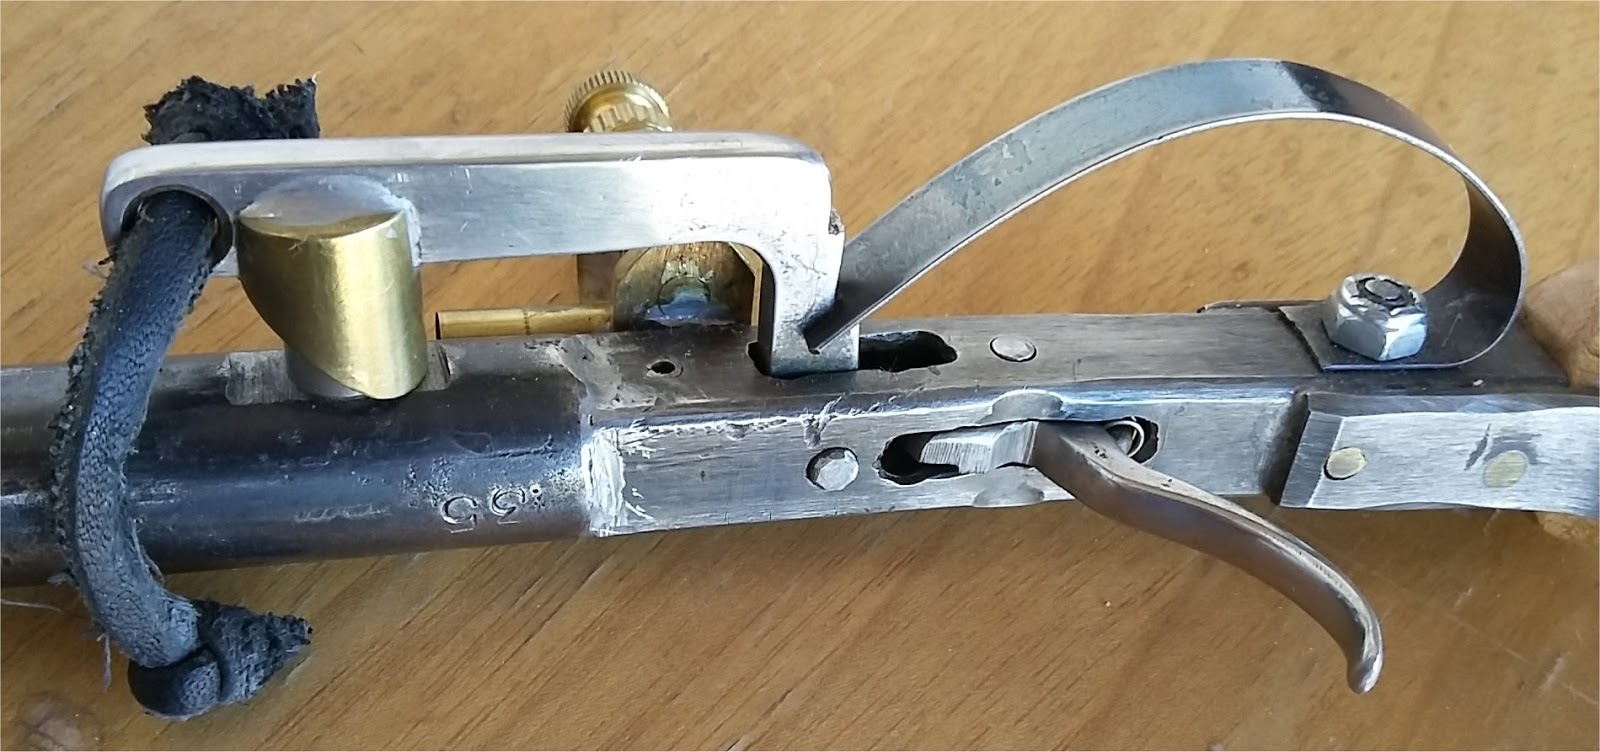
The Frame

Closer, notice the nice rough cutting of that square tubing. Hey, it works fine.:-) Yes, the barrel is soldered to the frame as well as pinning the plug (roll pin).

The Action
Held with the help of alligator clips.
Top views, this is a cocked positioning of parts.The lines on the page below sort of illustrate the alignment to the frame. As the trigger pulls back, there is a sliding of the trigger to hammer surface, I just use some grease.
Another Note:
When the hammer is cocked, it pushes the trigger sideways onto the frame. I made sure that the trigger slot kept the trigger from moving sideways, and more grease. The trigger has that large head to keep it against the frame slot and not pop inside (of the frame) at any time.

Shows the fit of parts, the hammer/trigger gap.

Tilted view. The trigger notch here is really not necessary but I ran out of room for the thing to work, hence the notched trigger.
Trigger spring is an ink pen spring, trimmed to fit, sitting on a brass pin.
EDIT: The brass pin for the spring keeps the spring from folding and also is the trigger stop.

Just another top view, cocked. As the trigger pulls back, the trigger nose disappears below the hammer point, bang!
Actually the trigger is too high here, the trigger pin would be centered (and lower) on the hammer flat. Note the frame hole positions above.

Actually the next three pictures are WRONG, sorry. The trigger should be BACK not FORWARD.
I will re-take the pix and update.
Fired positions here.
Trigger forced forward, all sliding surfaces rounded for smoothness. Not polished just smooth.
Here is where the trigger spring forces the trigger forward as the hammer falls.
Pulling the hammer back to cock it, the hammer and trigger faces are rounded to allow a smooth movement of parts. Funny shapes but for a purpose, nothing squared where parts are touching.

Another view.

Last view

More Pictures
Trigger position within the frame
At rest, fired.
Pulled to fire.

Cocked.

Parts, some blurred, cussed cell phone auto-focus!
Two spring notches for testing of the spring strength. Close to the pivot is weaker, farther out nearest the bend is much sturdier. The inner one is chosen for now is it doesn't bash the nipple too much.

Slightly rounded hammer point, on the bottom side of the point.

Fussy, sorry. Shows the rounded portion of that hammer point.
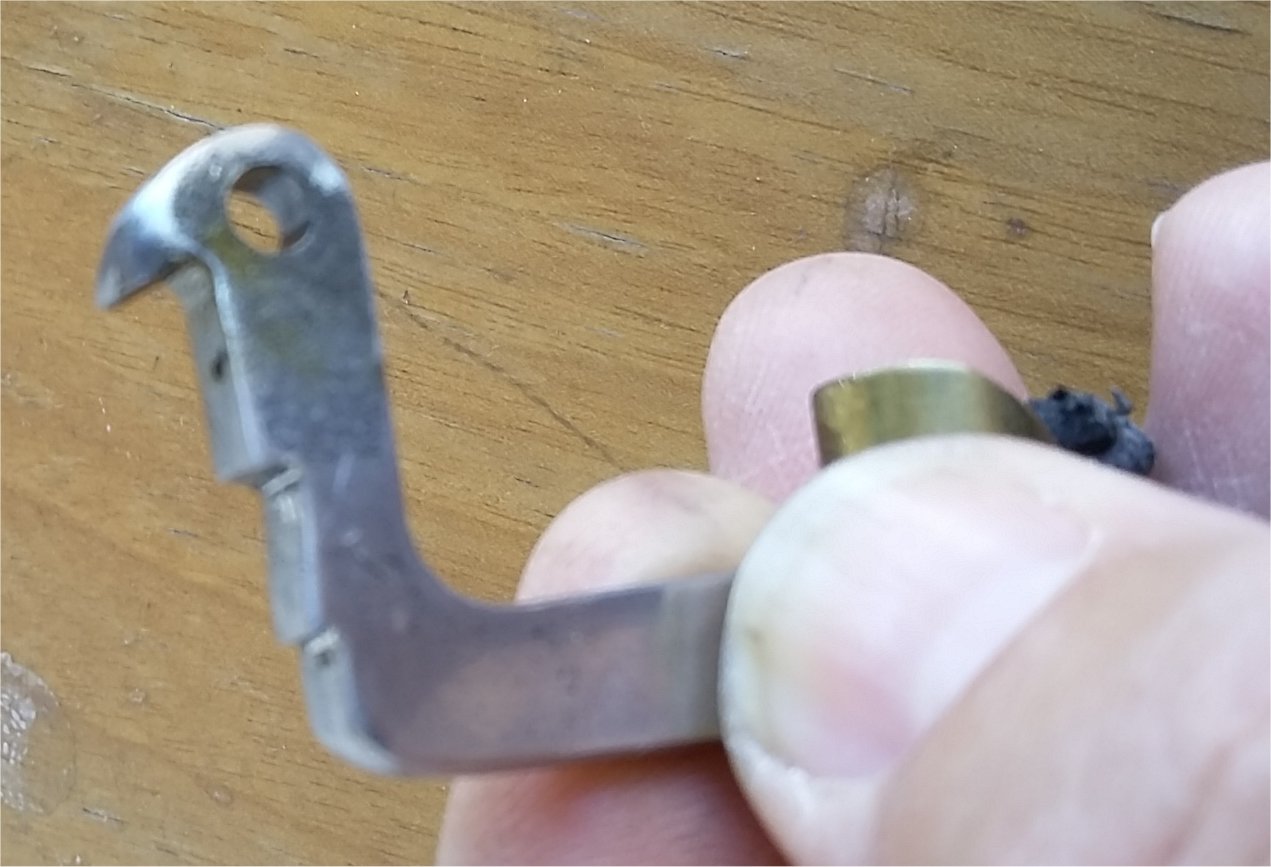
The spring pin is also the trigger stop.
Rub points can be seen where the trigger rubs the frame at full cock.

Don't remember why that small brass pin is on top. Maybe a movement forward stop.

IdeZilla
Comments Welcomed